Thursday, April 28

Kitchen Tip!

Does your cutting board slip and slide all over the counter when you're trying to cut your fruit and vegetables?  If so, here's a simple kitchen tip that will protect you from cutting yourself.


Take a paper towel sheet and put it under the faucet and get it wet.  Ring it out so that it's just damp.  Then lay it down on your counter.


Place your cutting board down on the damp towel.  Now, see if you can move it.  The cutting board should be fixed in place by the damp towel. You shouldn't be able to move it in any direction.

So you ask, "how will this keep me from cutting myself?" 

If you are slicing and dicing fruits and veggies and the board isn't stabilized,  and it moves, the knife could slip causing you to cut yourself.

This is a simple and inexpensive way to keep your fingers safe.  Of course, always be sure that your knives are sharp.  A dull blade is more dangerous than one that is sharp, and of course, never turn your head while slicing something.  That's a sure way to injure yourself.

I hope this tip was helpful!

Happy Cooking!

Monday, April 25

Make Prince Williams (Grooms) Wedding Cake!


When I heard that people all over the United States and the world would be celebrating Prince William and Kate Middletons wedding by having their own parties, I thought it would be perfect to share with you one of the recipes for the wedding cake.  Apparently, Prince William and Kate Middleton will have two wedding cakes.  Kate Middletons favorite is a type of fruit cake (Bride's Cake) while Prince Williams is a Chocolate Biscuit Cake (Groom's Cake) that he use to have when celebrating  his birthday, and it's still his favorite.

When I heard this I immediately went to a cookbook I purchased a year or so ago by Darren McGrady.  He was the private chef for Princess Diana and her family up until just after she passed away.  In his book he shares the Chocolate Biscuit Cake recipe (Groom's Cake) which will be one of the cakes prepared for all those attending the wedding.

This morning on The Today Show, Bon Appetit shared their version of the recipe.  However, according to Darren McGrady's book,  Eating Royallythis is the recipe Prince William grew up with.

A very simple recipe, with few ingredients, and it's a no bake cake!  The only ingredient that you may have trouble finding are the McVities Digestive Tea Biscuits.  I found mine at World Market however, they also had them at Global Foods here in town.  So if you have either of those in your area you can pick them up or order them on Amazon


To me, the biscuits taste like Carr's Wheatmeal Crackers, kind of a sweet crumbly biscuit.  They're really quite good. 

It's no wonder Prince William loves this cake.  After viewing the recipe and making it, I'm sure you'll agree, it's like a large Kit Kat Cake only with superior dark chocolate. 

Note:
The icing is just simply melted chocolate.  I think I would have preferred making a ganache or using the icing that I use on my Chocolate Avalanche cake where it's a bit thicker and richer.  I didn't try The Today Shows version of icing but that might not be bad either.  Maybe had I left it to set a bit it would have thickened up, however, it said to melt it and then pour it over the cake.  If you try it let me know which version of icing you used and what you thought.

If you'd like to make this cake continue reading........


Chocolate Biscuit Cake
makes 8 servings

1/2 teaspoon butter, for greasing pan
8 ounces McVities rich tea biscuits
1/2 stick (4 tablespoons) unsalted butter, softened
1/2 cup granulated sugar
4 ounces dark chocolate (I used Lindt)
1 egg, beaten
8 ounces dark chocolate, for icing (Lindt)
1 ounce white chocolate, (Lindt) for decoration


Lightly grease a 6 inch springform pan (I used a 7 inch), with 1/2 teaspoon butter, and place  parchment paper on top.  Break each of the biscuits into almond-size pieces by hand and set aside. 


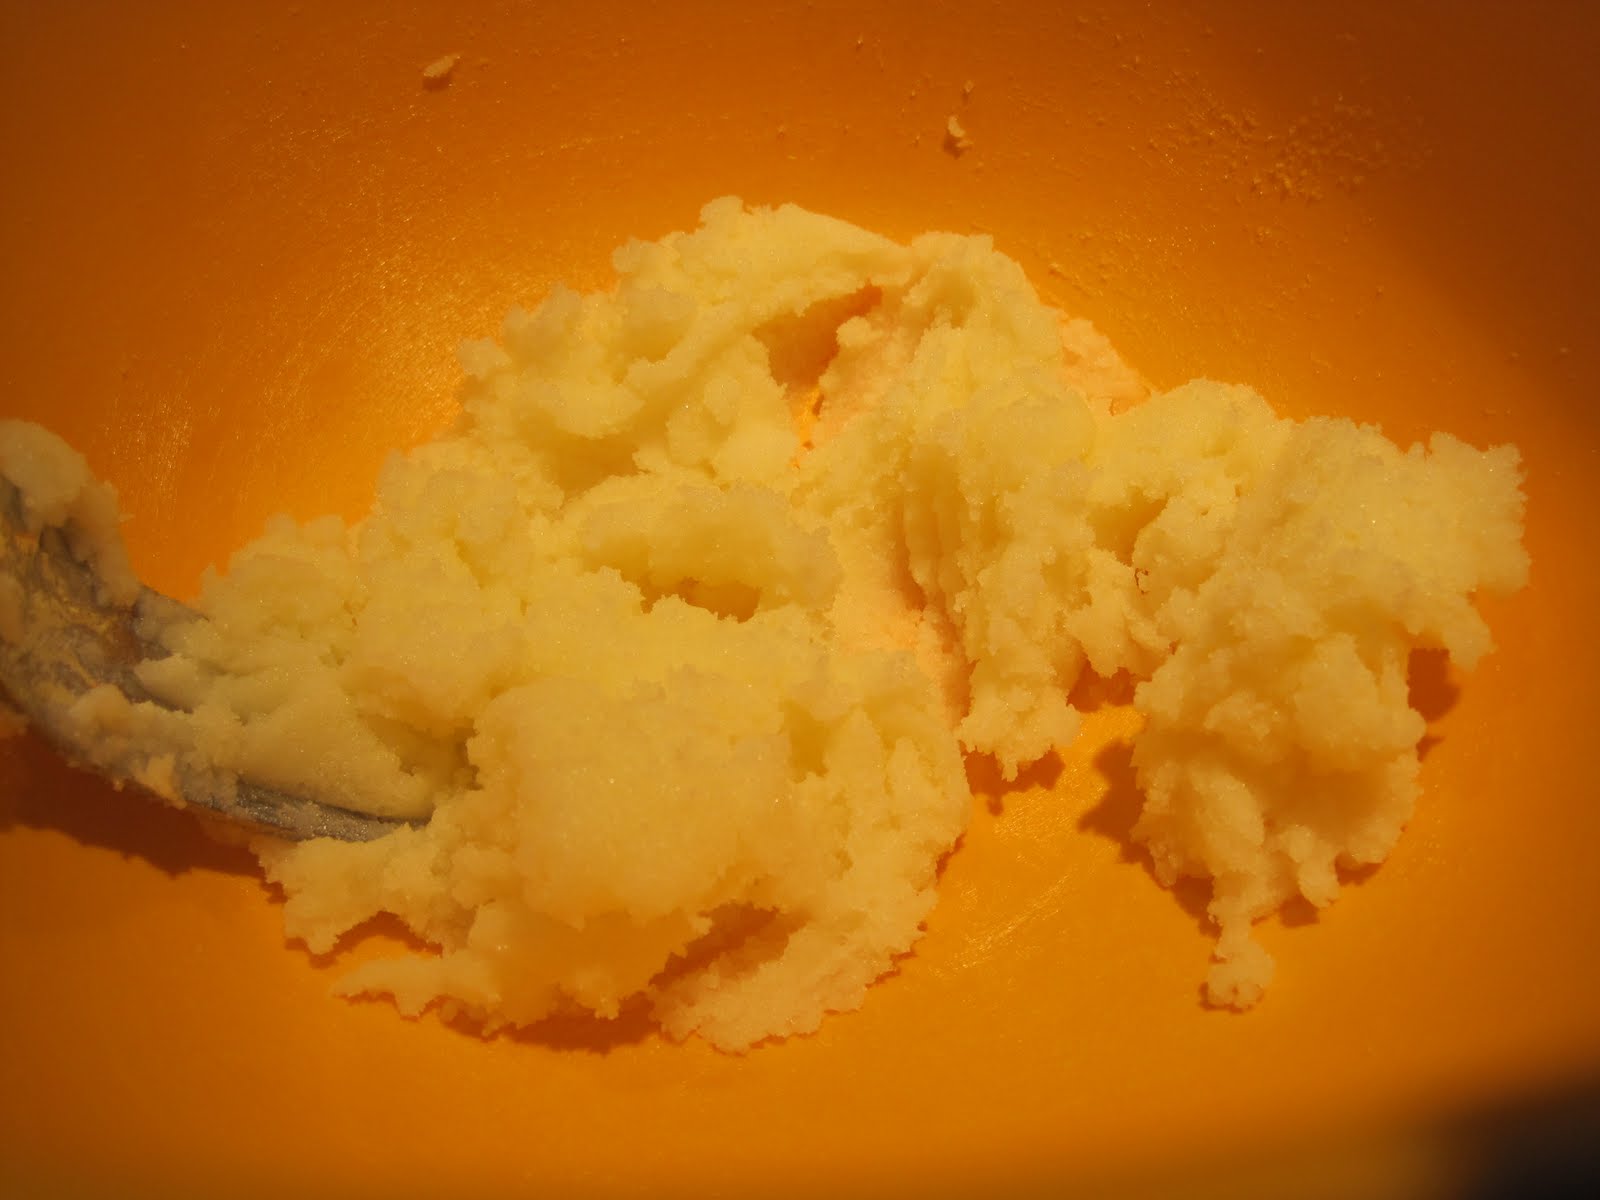
Cream the butter and sugar in a bowl until the mixture is a light lemon color.


Melt the 4 ounces of dark chocolate in a double boiler. 


Add the butter and sugar mixture to the chocolate, stirring constantly.  Add the egg and continue stirring.


Fold in the biscuit pieces until they are all coated with the chocolate mixture.


Spoon the chocolate biscuit mixture into the prepared springform pan.  Try to fill all of the gaps on the bottom of the pan, because this will be the top when it is unmolded.  Chill the cake in the refrigerator for at least 3 hours.

Remove the cake from the refrigerator, and let it stand while you melt the 8 ounces of dark chocolate for icing. 


Slide the ring off the cake and turn the cake upside down onto a cooling rack (I placed a cake board on the rack so that I could easily lift it up once iced).  Place some foil under the rack to catch any extra drippings from the icing. (I also laid parchment paper on the board which was slightly bigger than my cake. This way once the icing was poured over the cake I could remove the parchment without showing a mess).


Pour the 8 ounces of melted dark chocolate over the cake, and smooth the top and sides using a butter knife or offset spatula.  Allow the cake icing to set at room temperature.  Carefully, transfer the cake to a cake dish.  Melt the white chocolate and drizzle on top of the cake in a decorative pattern.


That's all there is to it.  Slice and enjoy.  YUM!

I think that either you need to let the chocolate cool a bit before pouring it over the cake, so it has time to thicken a bit or something was left out of the icing recipe or needs to be added to thicken it up.  See my "note" above in the beginning for suggestions.

Even though my cake didn't have a thick coating of chocolate over it, it still tasted delicious.  I followed the directions exactly as stated.  It really is tasty, you should try it or a version of it!

Don't forget to watch the Royal Wedding of Prince William and Kate Middleton this coming Friday at 4:00am EST.

Sunday, April 24

Happy Easter!


For those of you celebrating Easter today, I wish you a very Happy Easter! I hope you enjoy this special day with your family.

Saturday, April 23

Easter Egg Cakes Made Right In The Shells!


I'm always looking for recipes that are out of the box so to speak.  So when I read the post from the Cupcake Project and Delicious Days on how they made Cake Eggs right in the shells of a real egg I thought this was something I needed to attempt. 

It was really quite simple, just a little time consuming, but the results were well worth it, fun and a fantastic surprise for the Easter table!

Before starting this baking project I had every intention of stuffing the cakes once done with lemon curd.  However, I realized once they were cooked there was no way I wanted to tackle that.  The cake eggs were so light and fluffy that I stood the chance of ruining them.  So instead I figured I could plate them with drizzles of lemon curd all around the egg cakes by using a squirt bottle or place each individual cake in a ceramic egg holder.

I decided I'd use Stef's recipe from the Cupcake Project for my first run, but instead of using the sour cream I used plain yogurt. They turned out delicious!  Let me walk you through the steps of how these were done.  I'm sure you'll probably have all or most of the ingredients already in your pantry.


Easter Egg Cakes
makes 10 large egg cakes

Ingredients:
  • 10 large eggs - however, you'll only be using one egg for the cake batter.  (Save the rest and make a great Fritatta for brunch).
  • 1/2 cup all-purpose unbleached flour
  • 1/4 teaspoon baking powder
  • 1/8 teaspoon baking soda
  • large pinch of kosher salt
  • 1/2 cup granulated sugar
  • 1/4 cup unsalted butter, melted
  • 1/2 teaspoon Pure Lemon Extract
  • 1/4 cup plain yogurt
Prepping the eggs:


Using a pin or tip of a corkscrew, carefully poke a small hole in the base (larger end) of the egg.


Then carefully peel away about a 1/2 inch to 3/4 inch circle of the shell and thin film below the shell.  Turn the egg over a bowl and remove the entire egg from the shell.  To remove the remaining egg I used a round popsicle stick to carefully help scoop out the contents.  Do this same thing with the rest of the eggs. 


At this point rinse the insides of the eggs carefully with a slow steady stream of water over the sink.   Then place the rinsed eggs into a bowl of salt water.  I used about 1/4 cup of Kosher salt and then enough water to cover the eggs.  Be careful when submerging the eggs into the water so the shells don't break.  Leave them to soak for 30 minutes.


Rinse the eggs and lay on a paper towel to drain with the holes setting directly on the towel to dry out.

Directions for making the cake batter:
  • In a small bowl mix the flour, baking powder, baking soda, and salt.  Set aside.
  • In a large bowl, mix one egg and the sugar until blended and smooth.
  • Add the butter and lemon extract and mix until thoroughly combined.
  • Add the plain yogurt and blend until smooth.
Using some non-stick spray carefully place the nozzle into the hole of each egg and spray.  Carefully swirl the egg around so that the non-stick contents cover the insides of the egg.


Set a popover pan (which I used) or cupcake pan (which would need a base of aluminum foil set into each cup to help the eggs stand upright) in front of you on the counter. 

Place the cake batter into a pastry bag fitted with a large round tip or you can use a plastic baggie.  Make sure that the tip will fit into the hole of the egg.  Gently fill each egg approximately 3/4 full.  If you don't fill enough your cake won't look like an egg.  I filled all of mine 3/4 -7/8 full. Remember the batter will expand.  If some of the batter spills out of the egg, don't worry you can easily clean it up and nibble on the scraps.  You can then clean the egg with a damp paper towel.

Bake the eggs in the pan at 350F for about 23-25 minutes. 

Let cool completely before peeling the eggs.  However, if you prefer you can also serve them directly in the shell and let your guests peel their own.


These are great served with lemon curd. As I mentioned, I had fully intended to stuff these with the lemon curd but they came out so light and fluffy that I was afraid I would ruin the cake eggs so didn't bother.

These are fun to make and I am sure your kids will enjoy it as well.  Just make sure they handle the eggs very carefully so they don't break them. 

Have fun making these and have a very Happy Easter!

Wednesday, April 20

Fun with Easter Eggs!


Ever since I was a little girl I loved decorating Easter Eggs or any eggs at all, it really didn't matter what time of year it was.  In fact, my grandmother who lived with us would give me the dry outer skins from the yellow onions and have me put them in with my eggs as I hard-cooked them.  The golden color from the skins would come off onto the eggs giving them a beautiful and natural golden color.  You would have thought that we had chickens that laid GOLDEN EGGS!

However, today they have all sorts of dyes to add to your eggs shells (available at craft and cake decorating stores) that enhance their colors and make them almost whimsical-like.  Rather than going out and purchasing all sorts of templates though to decorate your eggs with, below are some fun ideas that you can easily do at home with your kids, so they can have their own whimsical eggs this Easter!

However, before going out and purchasing those eggs here are some safety tips you should consider:
  • Always buy eggs from a refrigerated case and keep them refrigerated before you boil them in preparation for decorating. Be sure to check the "Sell by" dates.
  • When you boil your eggs, make sure the water is hot (185-190 degrees F). Cool your eggs in cold water or allow cooling slowly at room temperature.
  • When shell eggs are hard-cooked, the protective coating is washed away, leaving open pores in the shell where harmful bacteria could enter. Be sure to refrigerate eggs within two hours of cooking and use them within a week.
  • Don't eat or cook with cracked eggs or eggs that have been un-refrigerated for more than two hours.
  • If you plan to eat the Easter eggs you decorate, be sure to use only food grade dye. (Some people make two sets of eggs - one for decorating and hiding, another for eating.)
  • Make sure to wash (and re-wash) your hands, utensils, and work surfaces to keep bacteria from spreading.
  • Hide eggs in places that are protected from dirt, pets, and other bacteria sources.
  • Limit the hiding and hunting time for real eggs to two hours. Refrigerate them immediately if they are to be eaten.
  • Eggs found hours later or the next day should be thrown out -- not eaten!
Now For Some Fun Decorating Ideas!  
Decorating with Stickers is a fun and simple way to create whimsical Easter eggs.


Materials:
  • hard cooked eggs
  • egg dye
  • Stickers (paper reinforcements, store bought stickers or even designs you've created by cutting shapes out from Con-Tact paper
Instructions:
  1. Begin with a cooled egg and cooled dye; otherwise, the adhesive gets sticky and difficult to remove. Cover the egg with stickers, then dip the egg until the desired shade is achieved.
  2. Let the egg dry, and remove the stickers. If you wish, you can remove only some of the stickers and dip the egg in a second color.
Another fun technique is simply using rubber bands. 


Materials:

  • hard cooked eggs
  • egg dye
  • rubber bands of various widths and sizes, long enough to wrap around the egg several times
  • paper towels
Instructions:
  1. Wrap rubber bands around the egg, covering it as much or as little as you like.
  2. Dip the covered egg into the dye. The color will seep under the bands in some areas and be blocked out in other areas. Remove the egg when the desired shade is achieved.
  3. Blot dry with paper towels and remove the rubber bands. If you like at this point you can repeat with a new color.
The last one it to sponge paint your egg.


Materials:
  • hard cooked eggs
  • scissors
  • kitchen sponges
  • tempera paints
Instructions:
  1. Cut out small shapes, about 1/2-inch wide, from the sponge (a thin rectangle was used above to make the zigzag pattern).
  2. Dip the sponge into the paint, dab off the excess and make a pattern of stamps on the egg.
Tip:  To keep your colors fresh and bright use a different sponge for each color.
         Of course don't forget you can also use stick-on jewels to embellish your eggs too!Remember if you're hard-cooked eggs never come out right, read my blog post on getting perfect hard-cooked eggs everytime!
Wishing you a Happy Easter and Happy Easter Egg Hunting!


Saturday, April 16

Tri-Color Gefilte Fish for Passover!


I have a recipe to share for those of you that will be celebrating Passover which begins at sundown this coming Monday, April 18th, and runs for 8 days. I realize not everyone may love Gefilte Fish even if you've grown up with it, however, this simple to prepare dish makes for a delightful and stunning appetizer if you are a fan.  It was created by Susie Fishbein and can be found in her book, Kosher by Design

Tri-Color Gefilte Fish
serves 10-12

This easy spin on traditional gefilte fish has three different colored layers for a sophisticated look. It takes only 5 minutes to prepare. The recipe uses a 9-inch springform pan with a removable bottom. If you are using a larger springform pan you may need to use 1-2 loaves per layer. Playing with the amounts won't affect the cooking method, but you may need to increase the cooking time by 10-15 minutes.


Ingredients:

2 (22-ounce) loaves plain gefilte fish, defrosted in wrapper
1 (22-ounce) loaf salmon gefilte fish, defrosted in wrapper
2 tablespoons fresh dill, chopped
1 lemon
6 cucumbers for horseradish wells, plus one extra long cucumber for top garnish (optional)
prepared red horseradish (optional)
mayonnaise (optional)
yellow pepper (optional)

Preheat oven to 350 degrees. Spray a 9-inch springform pan with nonstick vegetable spray. Give it a heavy even coat. Open each of the 3 gefilte fish wrappers.

Add the dill and juice from lemon into one of the plain gefilte fish loaves. Mix thoroughly so the dill is dispersed evenly. Set aside.

Using a thin spatula, spread the plain gefilte fish into an even layer in the bottom of the springform pan. Top with an even layer of the salmon. On top of the salmon, spread an even layer of the lemon dill fish mixture.

Cover the pan with foil. Bake for 1 hour. If the fish does not look set in the center, remove the foil and bake 5 minutes longer.

Let cool and refrigerate overnight. Can be made a few days in advance. As an optional garnish, slice a long unpeeled cucumber by hand or by mandoline into paper thin slices. Lay the slices in concentric circles around the top of the fish.

Release the sides of the springform pan. To serve as individual servings, cut into wedges, like a pie. Trim any brown edges.

Cut the cucumbers into 2- to 3-inch pieces. Hollow out the center. Mix a few tablespoons of the prepared horseradish with a little mayonnaise to make a pretty pink sauce. Fill the cucumber wells.

Serve a slice of fish on a piece of leafy lettuce with a cucumber well. You can decorate each plate with tiny squares of yellow pepper.

Enjoy and Happy Passover!

Wednesday, April 13

Warm Potato Salad!


With the weather getting warmer and everyone starting to BBQ and eat outdoors here's a nice side salad to serve with your meal.  Feel free to change up the ingredients.  If you're looking for more fat then add sour cream and butter.  However, for me the olive oil is just enough and although this has a bit of bacon in it I'd still consider it on the lighter side.

Warm Potato Salad

 serves 4-6 people


1 package baby Yukon gold potatoes
½ bunch dill, finely chopped
2 strips of bacon
Olive Oil
Salt and pepper

Place water in bowl of the steamer and boil. Once boiling place washed potatoes into the steamer basket, cover and cook until potatoes are tender, approximately 10-15 minutes.

In the meantime, take the strips of bacon and place on a hot griddle and cover with grilling plates if you have them. Cook the bacon until it’s done but not too crispy.

When the potatoes are done, cut them in half and place into a large bowl. Add dill and enough olive oil to coat. Crumble bacon over the top and season with salt and pepper.

Toss and serve.

Don't forget to enter my giveaway for the FireWire Grilling Skewers a couple posts down.  The giveaway ends Friday!

Friday, April 8

Bacon Sashimi - who would have thought!


"Bacon Sashimi" - I just had sushi for dinner tonight but when I read this article i just had to share it.


Raw Materials
New bacon from La Quercia needs no heat

With bacon-flavored lollipops, cupcakes and cotton candy all but standard fare, we rue that a delicious ingredient has become mere ornament.

Thankfully, La Quercia's new Tamworth bacon is battling that trend by taking a minimalist approach to the popular meat. Salted, dried and smoked, it requires no time on the stove. That's right: This is raw bacon.

The secret is in the genes. Tamworth, known in pork circles as the bacon pig, has a long belly with a higher meat-to-fat ratio than most. The fat is sweet and far lighter than the mouth-coating kind you find on Berkshires, that other beloved breed. La Quercia worked with Ozark Mountain Pork's Russ Kremer (known as the "pope of pork") for four years to nail the product.

Of course, you can cook it, and chefs have jumped at the opportunity. At Vie in Chicago, Tamworth bacon sits atop wood-grilled foie gras and maple pound cake. Hawaii's Big Island steakhouse Monette's wraps bananas with the bacon and also uses it as a base for its homemade steak sauce. And at Harrisburg, Pennsylvania's Bricco, chef Jason Viscount serves Tamworth with seared scallops in leek vinaigrette.

The purest beauty of this bacon, though, is that you enjoy it without turning on the stove: Toast bread. Top with thinly sliced bacon. Pronounce it "bacon sashimi." Eat.

Interested in purchasing some of La Quercia Tamworth Country Cured Bacon?  You can buy it here.

What will they think of next?  Although it does sound good!

Note: There was no name listed as the author of this article.

Firewire Grilling Skewers GIVEAWAY!


As many of you may know I love to grill and with the weather finally getting warmer I spend the better part of spring, summer and into fall grilling outdoors.  I reported on these back in July of 2009 when I had just ordered them and again just a couple of weeks ago.  Since receiving these I have used them often and love them.  I'm talking about the Firewire Grilling Skewers.

These skewers are so wonderful to cook with.  I don't know about you, but I can't stand having to take up so much space in my refrigerator when it comes to marinating my kebobs.  With the Firewire Grilling Skewers you simply load your food onto the wire, place them in a zip lock baggie that contains your marinade, and place them in the refrigerator, virtually taking up no space at all.  Unlike the typical metal skewers, these handles don't get hot, plus sliding your meat, veggies or fruit on them is a cinch and even easier to remove.  Don't take my word for it, just watch this video to see for yourself.

If you love to grill, and like doing any type of kebob, you need to enter my giveaway for the Firewire Grilling Skewers and Marinating Kit.  If for some reason your name isn't drawn, make sure you order a set for yourself either way.  It's an item you don't want to be without.  Plus, they're so easy to clean - just pop them in the dishwasher.  They literally take up no space at all.  I have mine rolled up in a plastic baggie in my kitchen drawer ready and clean for the next time I use them. 

To try your luck at winning the Firewire Grilling Skewers and Marinating Kit simply enter this random drawing by doing the following: 
  • "Like" the Firewire Grilling Facebook Fan page, made by Inno-Labs.
  • "Like" my FB fan page if you don't already and let me know
  • follow my blog with "google friend connect" at the top right of my blog, if you don't already, and post a comment.
  • don't forget to post on YOUR  facebook wall, "I just entered a giveaway for the Firewire Grilling Skewers on At Home with Vicki Bensinger, and you can too!" 
All entrants must live in the United States. 

A winner will be drawn at random on Friday, April 15th, 2011.

Good luck!

And the Winner is!

Maria Paray - Congratulations Maria!

Thursday, April 7

Quinoa with Roasted Vegetables


Tonight I was in the mood for some fresh fish and veggies but my husband just felt like a Roasted Chicken from the grocery store and a salad.  So I picked that up for him and roasted myself some fresh veggies with Quinoaand decided to forget the fish. 

I just didn't feel like anything heavy but something light and healthy.   When I was at the store I looked to see which vegetables looked their best.  I decided on eggplant, butternut squash, baby tomatoes and spinach and then for the protein I thought I'd make a batch of quinoa which contains 6 grams of protein.

There really isn't much of a recipe.  It's just simply boiling 2 cups of water and adding 1 cup of well rinsed quinoa to the boiling water.  After it returned to a boil, I turned the heat down to a simmer and I covered the pot for about 15 minutes.  I then turned off the heat and let it set for another 15 minutes to absorb the rest of the liquid and give the quinoa time to fluff up.

In the meantime, while the quinoa was cooking I washed the tomatoes, butternut squash and eggplant.  I cut the squash and eggplant into cubes and placed all 3 vegetables together, mixed with some olive oil on a foil lined cooking sheet.  I then placed the vegetables into a 450F degree oven for about 20 minutes or until all were tender, then drizzled the veggies with a chiffonade of basil.  I cooked my vegetables on convention/bake, so if you are just baking it would probably take closer to 30 minutes.


When the veggies were just about done I rinsed a 10 oz. package of spinach and put it into a pot (with just the droplets of water clinging to the spinach leaves), to cook for all of 4 minutes.  Just enough to wilt them and keep their bright green color.

At this point I placed a fistful of quinoa into a bowl and topped it with the roasted veggies and spinach.  

After eating this dish I was totally satisfied and full.  The protein in the quinoa really helps to fill you up while providing so many nutrititional benefits.

A simple yet satisfying meal.  If you're looking for something light, nourishing and delcious try making this dish. Of course feel free to substitute with the vegetables of choice.

Enjoy!


Wednesday, April 6

Mother's Day Culinary Class


I know, Mother's Day isn't until May 8th but, it's time to start thinking ahead. If you're like me, even though you may have children of your own, when it comes to celebrating Mother's Day, it just seems easier to celebrate at home.

Rather than taking your mom and mother-in-law out to eat, having it at home is more relaxing, and let's face it, it's easier on the pocketbook.

So I've decided to put together a culinary class that I'll be offering in the Westport Plaza area. Unlike my in-home culinary classes this will be a demonstration class.

Besides having a wonderful meal to share with your family on Mother's Day, this entire menu can prepared in advance, so that you too, can enjoy your special day!  Think of this as Mother's Day out on the terrace!

Date: Wednesday, May 4th, 2011
Time: 11:00am - 1:30pm
Cost: $60.00 per person

Mother's Day Menu

Tomato Bruschetta
Poached Salmon
Cucumber Ribbon Salad
Confetti Potato Salad
Lemon Curd Trifle with fresh berries

Plus some other nice treats and surprises!

Space is limited! If you are interested in signing up for this class please contact me at 314.799.1633 for further details.

Friday, April 1

LeCreuset GIVEAWAY!


If you've ever cooked with a LeCreuset French Dutch Oven, enameled cast iron cookware, you know how wonderful they are, along with the rest of their products.  Not a whole lot compares to its performance.  Perfect heat retention and even heat distribution make every dish spectacular. 

Just in time for Easter and Passover I'm offering a LeCreuset 3.5 French Round Dutch Oven valued at $280.00 to Giveaway.  If you've never tried one before you don't know what you're missing.  This perfect vessel will help you create an incredible dish for the holiday. 

The French Dutch Oven can cook rice, beans, soup, chicken, beef, stews, cake or whatever else you can think of.  It's truely amazing and it comes in a variety of fun colors to match your kitchen or your mood.

Besides having the opportunity to win one for FREE you also get to select the color of your choice.  So what are you waiting for! 


To enter the random drawing for the LeCreuset 3.5 French Dutch Oven you MUST follow the directions below!
  1. Under the comments section of this blog post, tell me why you would like to win the LeCrueset French Dutch Oven.  Plus if you win it, what color do you want for your kitchen?
  2. Sign up as a follower of my blog on Google Friend Connect by clicking the follow button.  This is located on the right side of my blog just above "About Me".  If you're already one then please let me know.
  3. "Like" my facebook fan page, by clicking on the "like" at the top of the page.  If you already do please let me know.
  4. "Like" the LeCreuset fan page, located at the top of the page then, post on your FB wall, "I just entered a GIVEAWAY on At Home With Vicki Bensinger to win the LeCreuset 3.5 French Dutch Oven, and you can too!
All of these MUST be done in order to have your name entered into the drawing.  However, don't forget to leave your contact information so that I can reach you in the event you win. 

One contest winner will be selected at random and notified on this blog and by email on Friday, April 8th, 2011.

The winner will have 48 hours to respond to my email otherwise your name will be removed and another name will be selected at random.

Don't miss your opportunity to win this amazing LeCreuset French Dutch Oven. 

Good Luck!

Below is a fun and simple recipe for making bread in the 3.5 LeCreuset French Dutch Oven created by Jacques Pepin from his book   More Fast Food My Way

However, the recipes are endless for what you can create in your new LeCreuset French Dutch Oven should you win!

Slow & Easy Bread In A Pot
make a 1 pound loaf of bread

This is perfect to start in the evening and then pop in the refrigerator overnight so it's ready in the morning to bake.


Ingredients:

 
2 1/4 cups tepid water (about 90 degrees)
1 tsp of yeast Rapid Rise)
1 tsp of salt (or a bit more)
4 cups of all-purpose flour (about 1 pound 5 ounces)

Directions:

In the 3.5 LeCreuset French Dutch Oven mix the above ingredients.
Stir them up until the dough is thoroughly blended and gooey. Cover the pot with blended ingredients and let set at room temperature for about 1 1/2 hours.

The dough will be puffed up a lit bit. Knock it down by mixing it up again with a wooden spoon for a moment, you don’t have to do too much. Then cover it and put it in the refrigerator overnight (10-12 hours).

The next day, preheat your over to 450F degrees. Once preheated, take the dough out of the refrigerator, and take the cover off (it should have risen again overnight).  Place the pot directly into the oven and bake for approximately 40 minutes.

After forty minutes, remove the pot from the oven. You will see that you have a perfect crust poking out from the pot. Let it sit and cool for a few minutes. 

Flip pot over and remove the bread.  Now how easy is that?

Enjoy!

AND THE WINNER IS:


  SANDRA DEE


Congratulations Sandra Dee!  I hope you enjoy your new LeCreuset 3.5 French Dutch Oven